
How to make a joiner photograph - Step 1
Rule #2: Make sure your photographs overlap.
To begin with I will show you the basic sequence for putting two photographs together. This becomes more complicated when light and colour values change a lot between shots as well as if the two parts to be joined are complicated shapes. So this example is relatively straightforward. Remember, there are many fine sites on the web with tutorials for PhotoShop™ that explain the program in greater detail. What follows in this turorial is the bare bones for making a simple joiner.
Below you can see two photographs that have been opened up in PhotoShop™ of a truck on tracks. The second shot was taken directly below the other one. Notice how much they overlap. In this instance it is more than half way.

In doing joiners you work with LAYERS. In a moment the second photo will be put on top of the first and create a new layer that can be worked on and leave the photo below untouched. The layers menu is open below the photos and calls the single layer the 'Background'. But before we put in a new layer we want to make a bigger area to work on. This is referred to as the 'canvas size'. To increase the canvas size we right click the blue bar at the top of the image that reads 'IMG_2416.jpg@12.5% (RGB/8)' and select 'Canvas Size'.
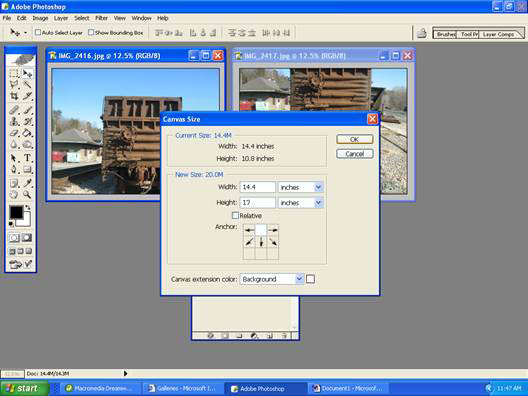
The anchor is set to the middle-top square and the height increased to, let's say, 17 inches.