
How to make a joiner photograph - Step 7
At this stage the joiner looks rather like this:
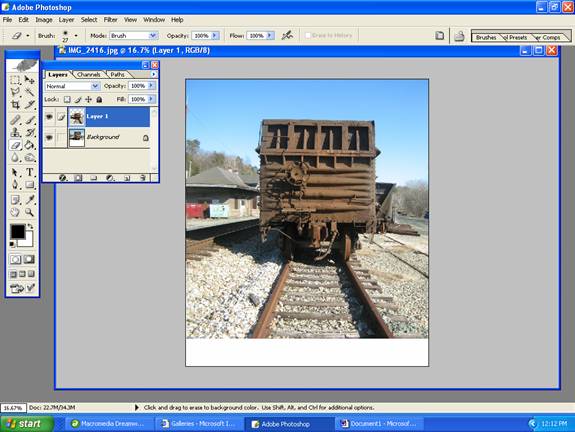
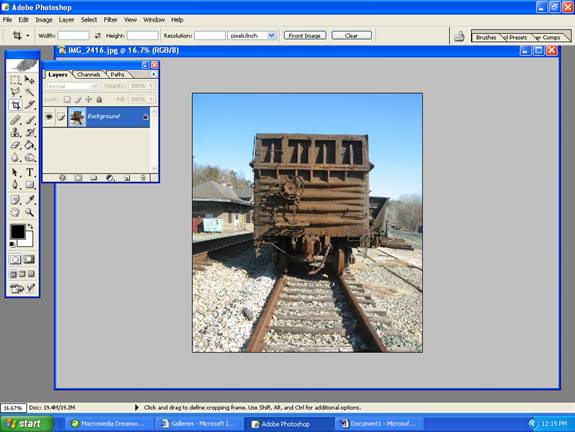
You can see the Layers pallette still shows two layers. This is easily flattened by pressing Ctrl+E which flattens the layer above onto the layer below. Make sure you are on the layer above for this to work. It flattens down. Next you use the CROP TOOL. You can see it selected in the following image which shows the dirty deed already done. To crop an image you click and drag a rectangle to cover the area you wish to remain after cropping - cleverly this can even be outside the existing limits of the photo area. You double click inside the area when you are ready to crop it to size. Don't worry if you get things wrong. Simply clicking Ctrl+Z removes your last action in the program.
That's how you make a simple joiner. If you can do it with two you can do it with twenty.
More How To pages will be added soon to further extend the identification and solution of the problems you encounter doing Joiner Photographs.