
How to make a joiner photograph - Step 4
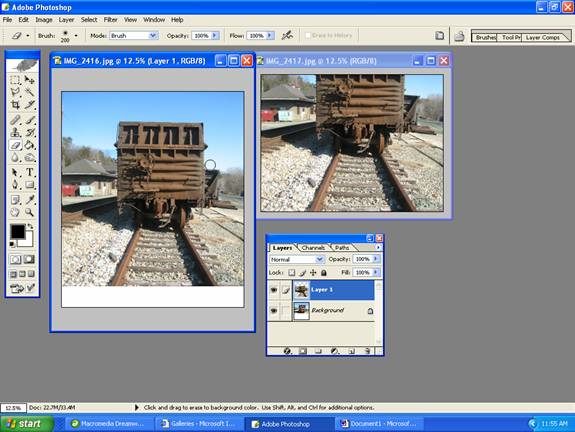
You can see the circle indicating the Eraser to the right side of the truck. Already the darker sky has been rubbed away from the layer. The same is done to the dark wedge of blue sky on the left hand side. To be more accurate you have to zoom in closer. To do this you can use the ZOOM tool which is shaped like a magnifying glass. You left click and hold to draw a rectangle to describe the area you want to zoom into. In this case it is the roof of the old railway building on the left.
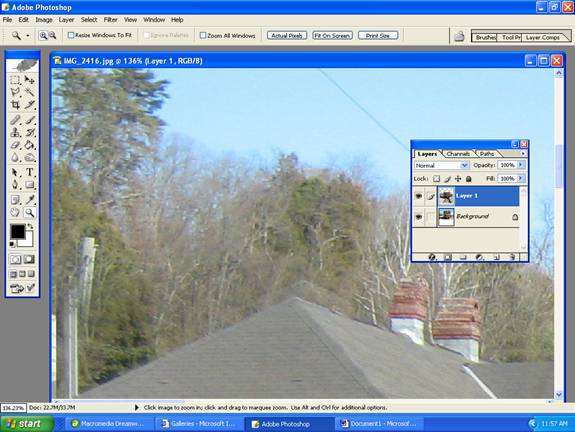
Already the Eraser has taken the top off the trees and is moving into the roof - to show the roof in the photograph on the layer below. An important part of joiner photography is knowing which bits to keep and which to erase and this can only be done by doing lots of them. The general rule is if you have a complete element (a roof, a door, a wall, an apple) in one photo try and use it, rather than having to deal with an edge that cuts through it and changes shapes and light and colour values.